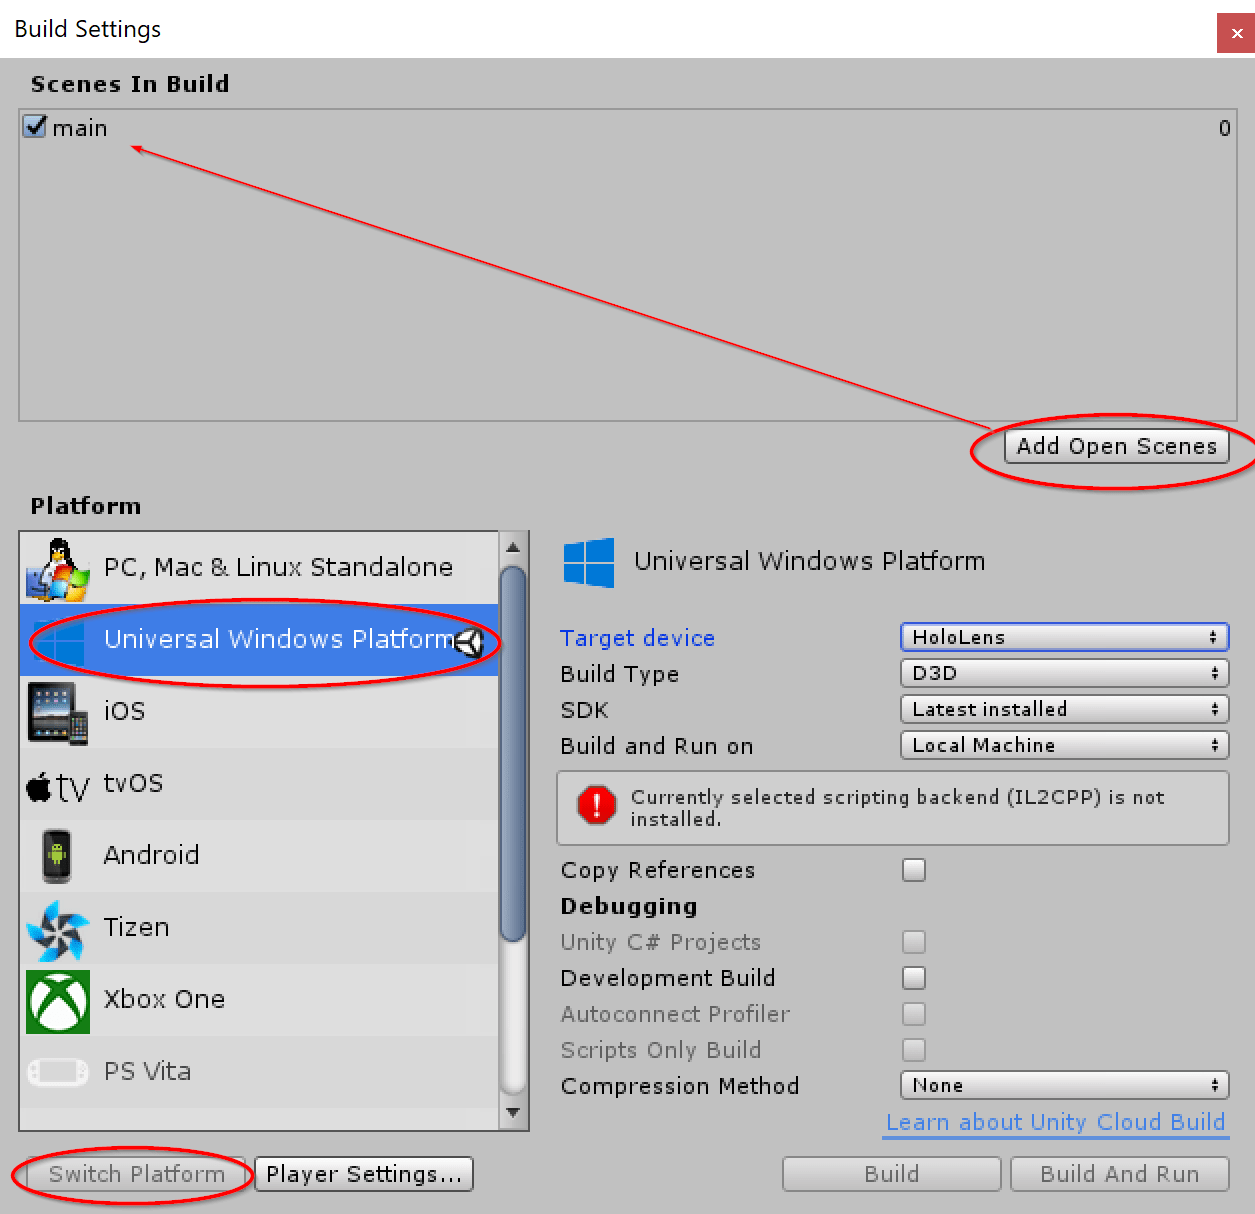
Notice the warning Currently selected scripting backend (IL2CPP) is not installed. That is because I only installed .NET support. We fix this problem in the player settings:
.NET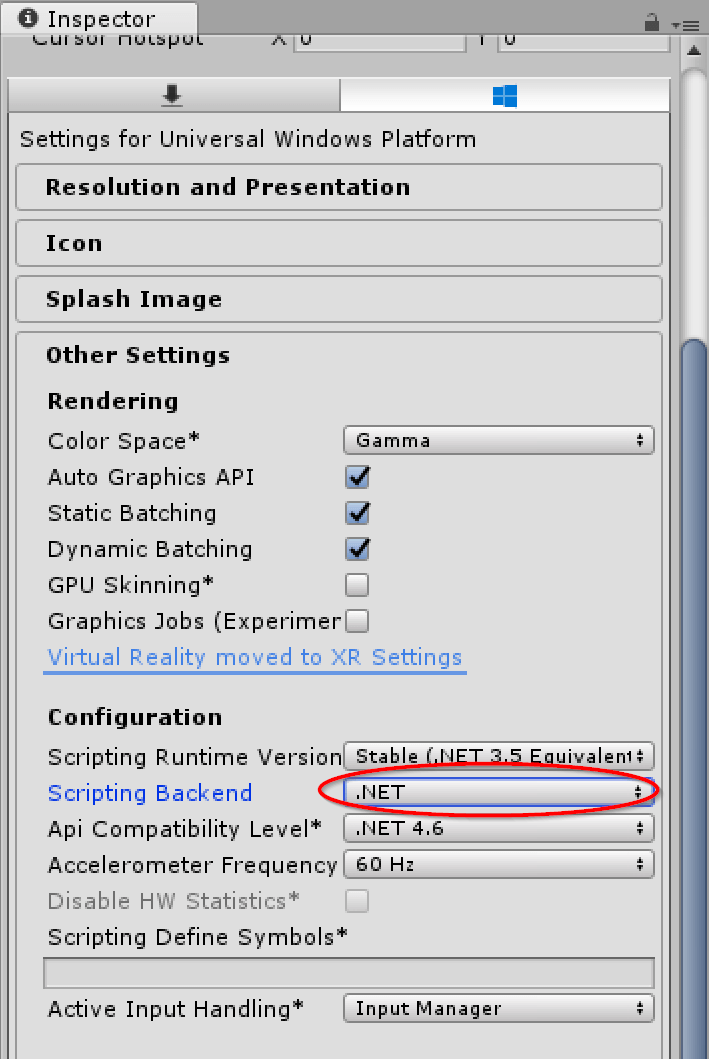
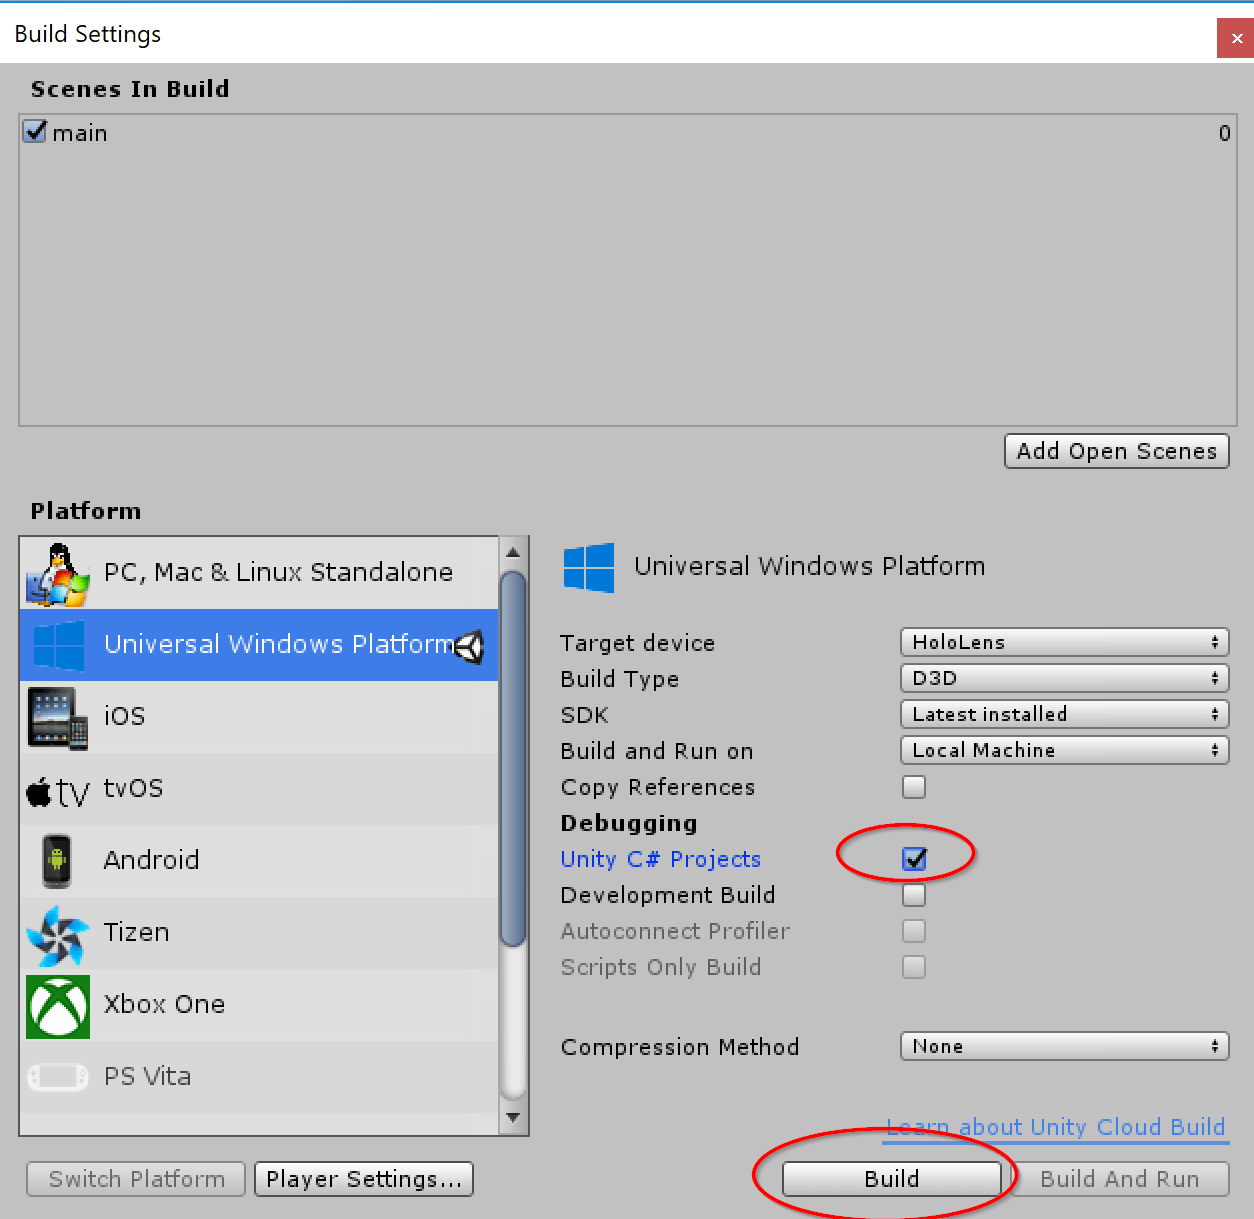
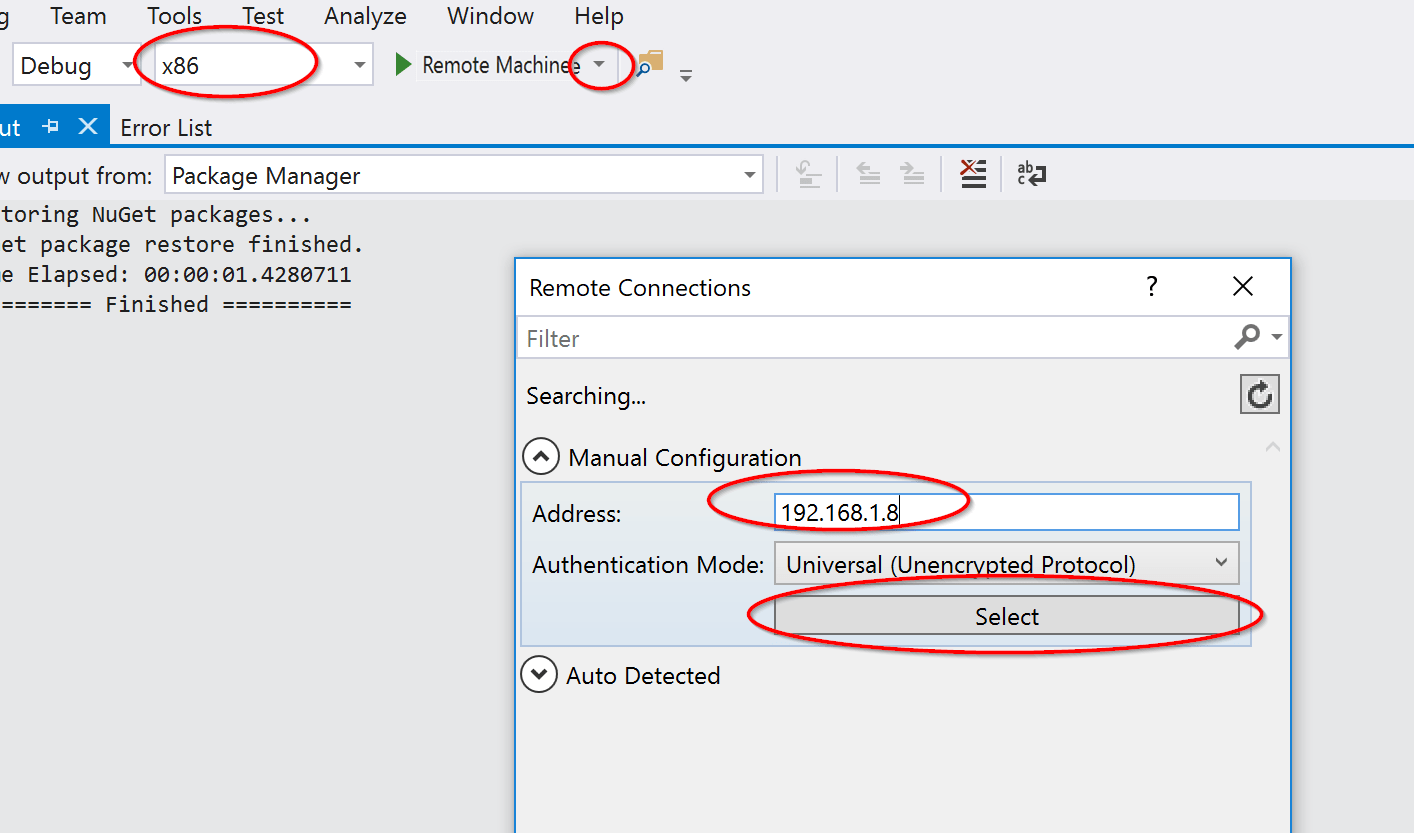
buildThe build now starts and can be opened in Visual Studio for deployment to the HoloLens.
build folder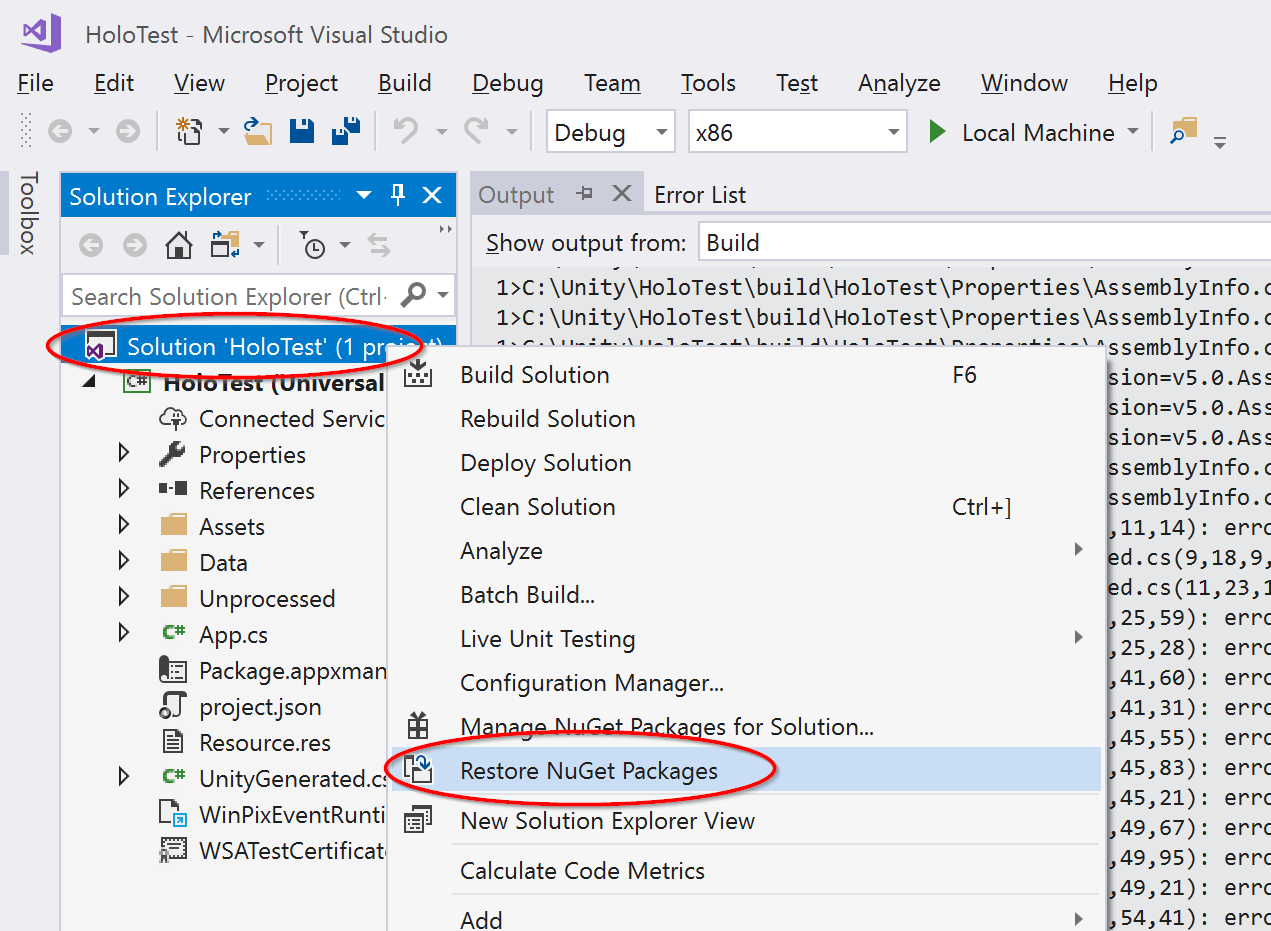
x86